The Ultimate Laser Level Setup
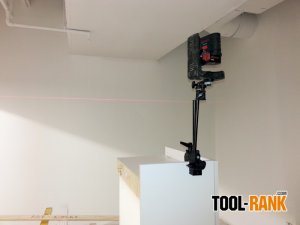
https://www.tool-rank.com/media/listing/photos/thumbnail/300x300s/5a/9d/16/laser20level-002-75-1431957820.jpgLaser levels are not only common on a jobsite; they are becoming essential. One of the problems with using them, though, is quickly positioning them at an exact height. In search of a better solution, I looked at what I already had, and I think I have found the perfect solution for leveling a laser that is quick, portable, versatile, and precise.
When it comes to setting the height of a laser, I typically see contractors using one of two methods: a tripod, or a magnetic mount. While a tripod is good in many situations, it has height limitations and it can be bulky. Magnetic mounts are another good option, but you are limited to whatever magnetic surface is near your working area and precision height adjustments can also be an issue.
My laser level setup is made up of three parts with a total cost of about $160, but to anyone who uses a line laser daily, it is a great timesaving investment.
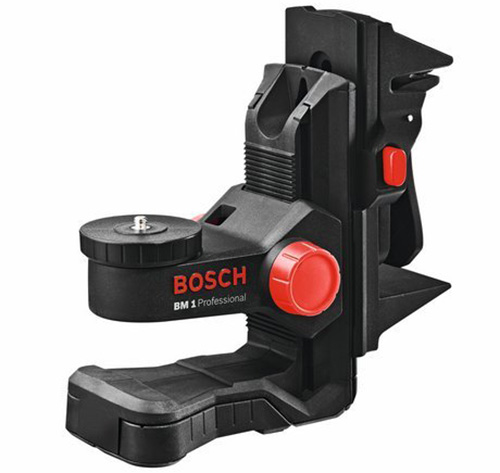
The first piece you will need is the Bosch BM1 Laser Positioning Device. It is a great tool all on its own, that when paired with a laser makes it easy to adjust its height. With rack and pinion gears, you can precisely dial in the laser to hit your mark. It features a powerful magnet, and a nail slot, which, both can be used to mount the laser. For many, this might be the only accessory you need for you laser, but if you can't go around putting screws into finished walls, you want to see what other accessories I use. - Amazon
For much of my work I can’t put a hole in a wall to mount the Bosch BM1, I also usually don’t have an area to use the magnet of the BM1; so I had to find another way to mount it. What I came up with is a mount I use for my own photography needs. The second and third parts of my setup are the Manfrotto Articulated Arm and the Manfrotto Super Clamp.
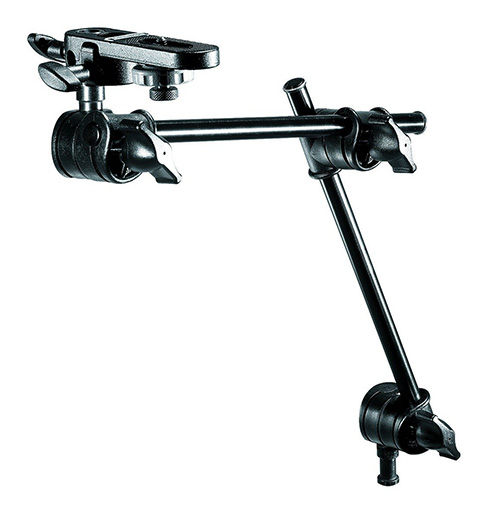
I use the Articulated Arm to roughly position the height of the laser and use the BM1 to dial it in. The arm has the added advantage of being able to extend out in any direction to get it further away from walls, or above obstructions. A Two Section Articulated Arm can get you roughly 24” of adjustability, and the Three Section can get you even more. - Amazon
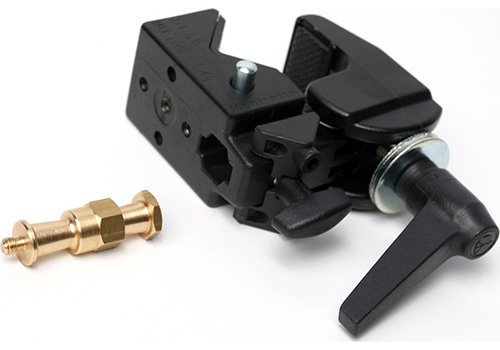
The Manfrotto Super Clamp is what I used to mount the whole setup. The jaws open wide enough to clamp onto wall studs and pipes, but I have used it to clamp onto doors, cabinets, my own tool cart and more. The Super Clamp is plenty strong enough to support the entire setup; so strong that you have to be careful not to damage wherever it is that you are clamping onto. - Amazon
My laser setup is so versatile that it would be hard to find a location where it could not be used, either the BM1 by itself, or combined with the Manfrotto Articulating Arm and Super Clamp. It is not a cheap setup, but it is strong, versatile, precise, and it packs down small enough that I can always keep it with me in my toolbox.

